Okta Custom Authorization Server
"Okta, is identity and access management cloud software that helps companies manage and secure user authentication into applications, and for developers to build identity controls into applications, website web services and devices.."
Overview
This guide is for the creation of a custom authorization server used to protect your own resource server which is distinctively different from accessing Okta’s own APIs. Okta refers to this as API access management and is an optional add-on in production environments.
NOTE: In order to access Okta’s own APIs your application will require to be configured for private_key_jwt auth which is not related to this guide.
Configuration
Reference: Create an authorization server, Client Credentials flow for your app, Create Scopes.
Pre-Requisites: Okta Developer Edition organization, An app that you want to implement OAuth 2.0 authorization with Okta
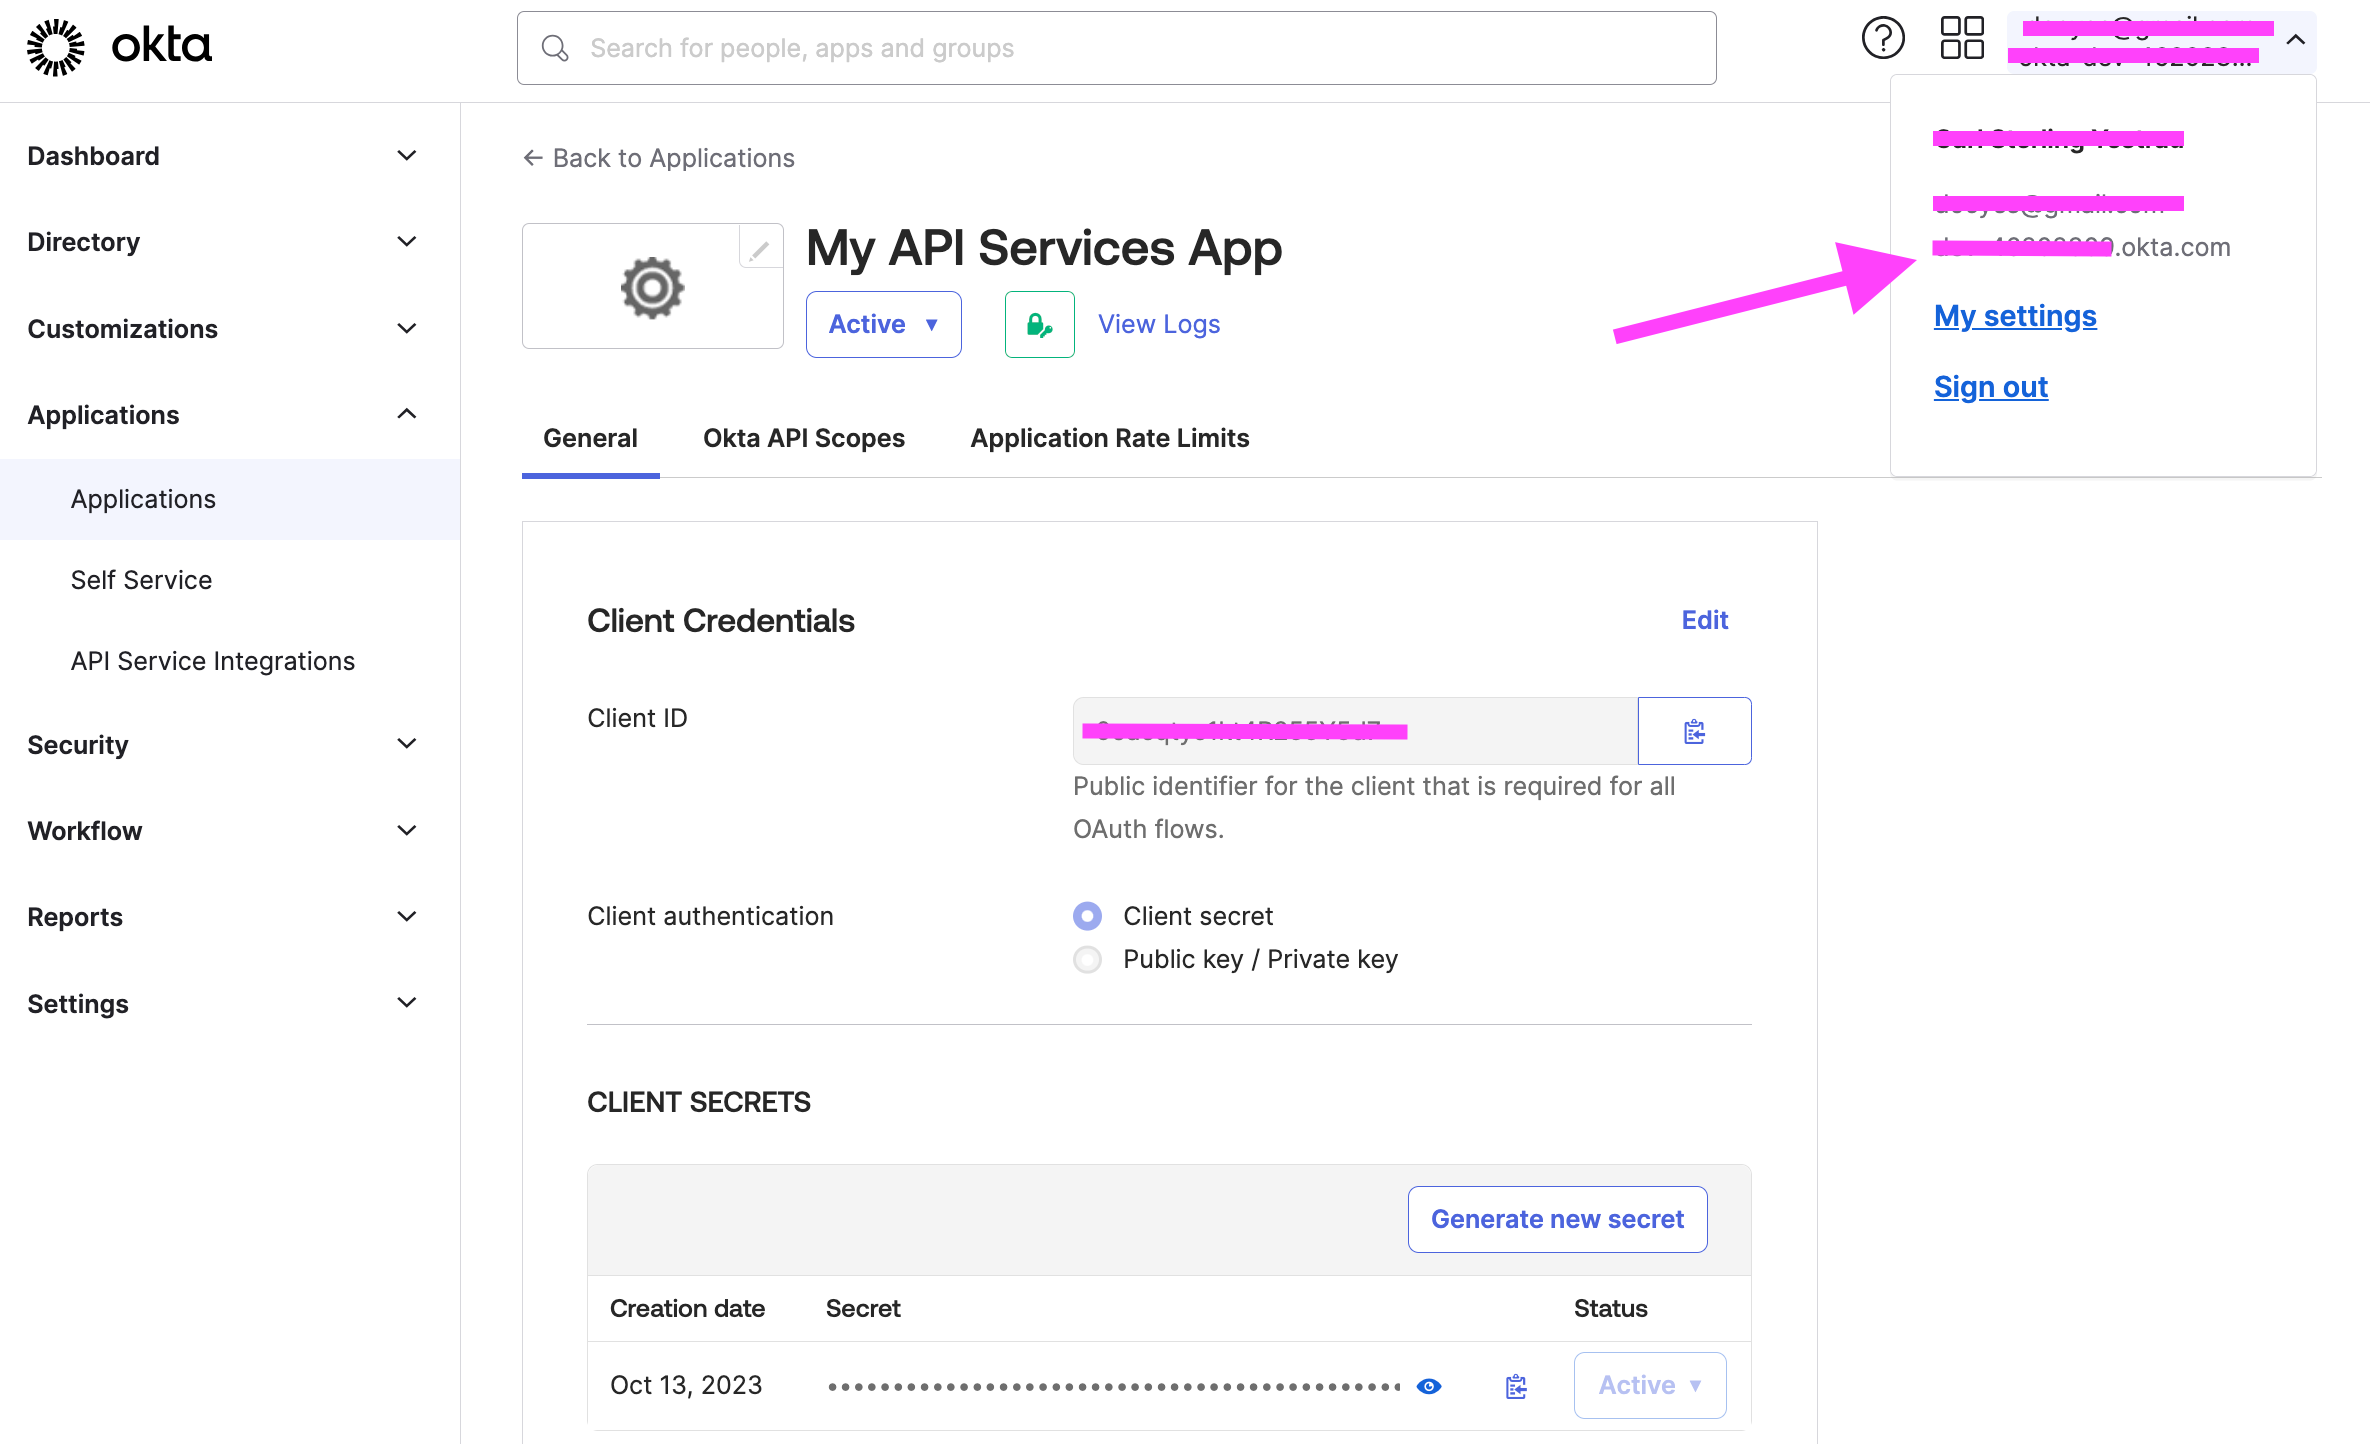
Before you can implement authorization, you need to register your app in Okta by creating an app integration from the Admin Console.
- Open the Admin Console for your org.
- Choose Applications > Applications to view the current app integrations. Click Create App Integration.
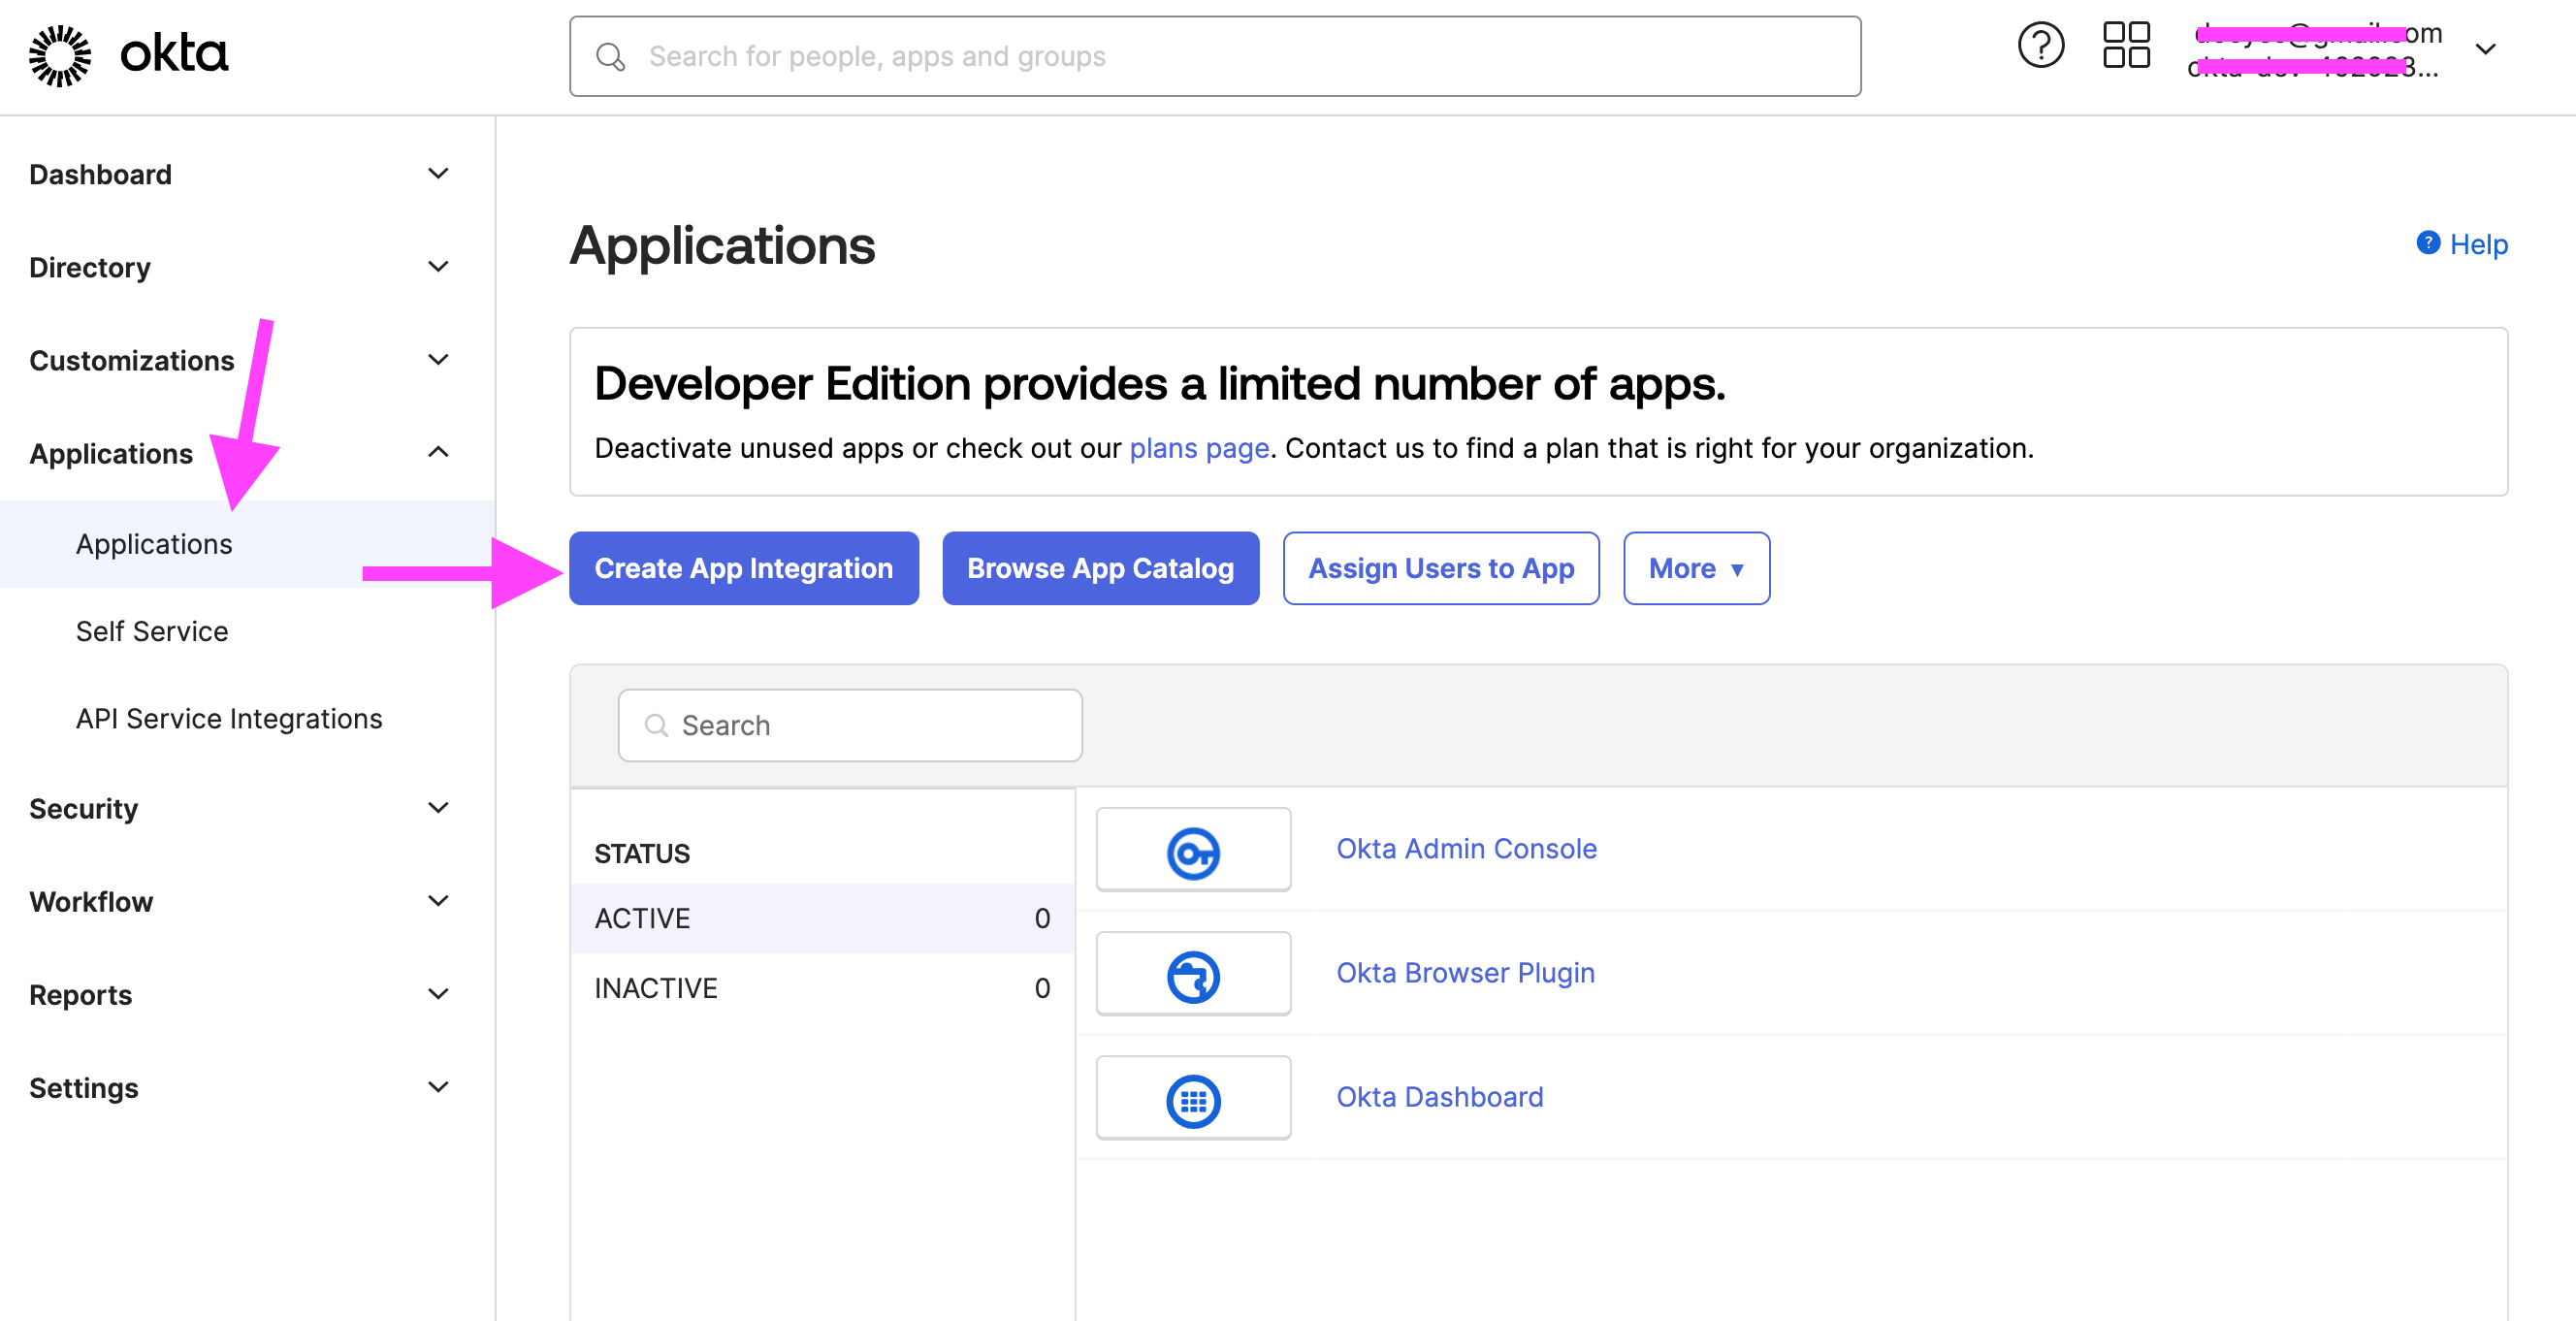
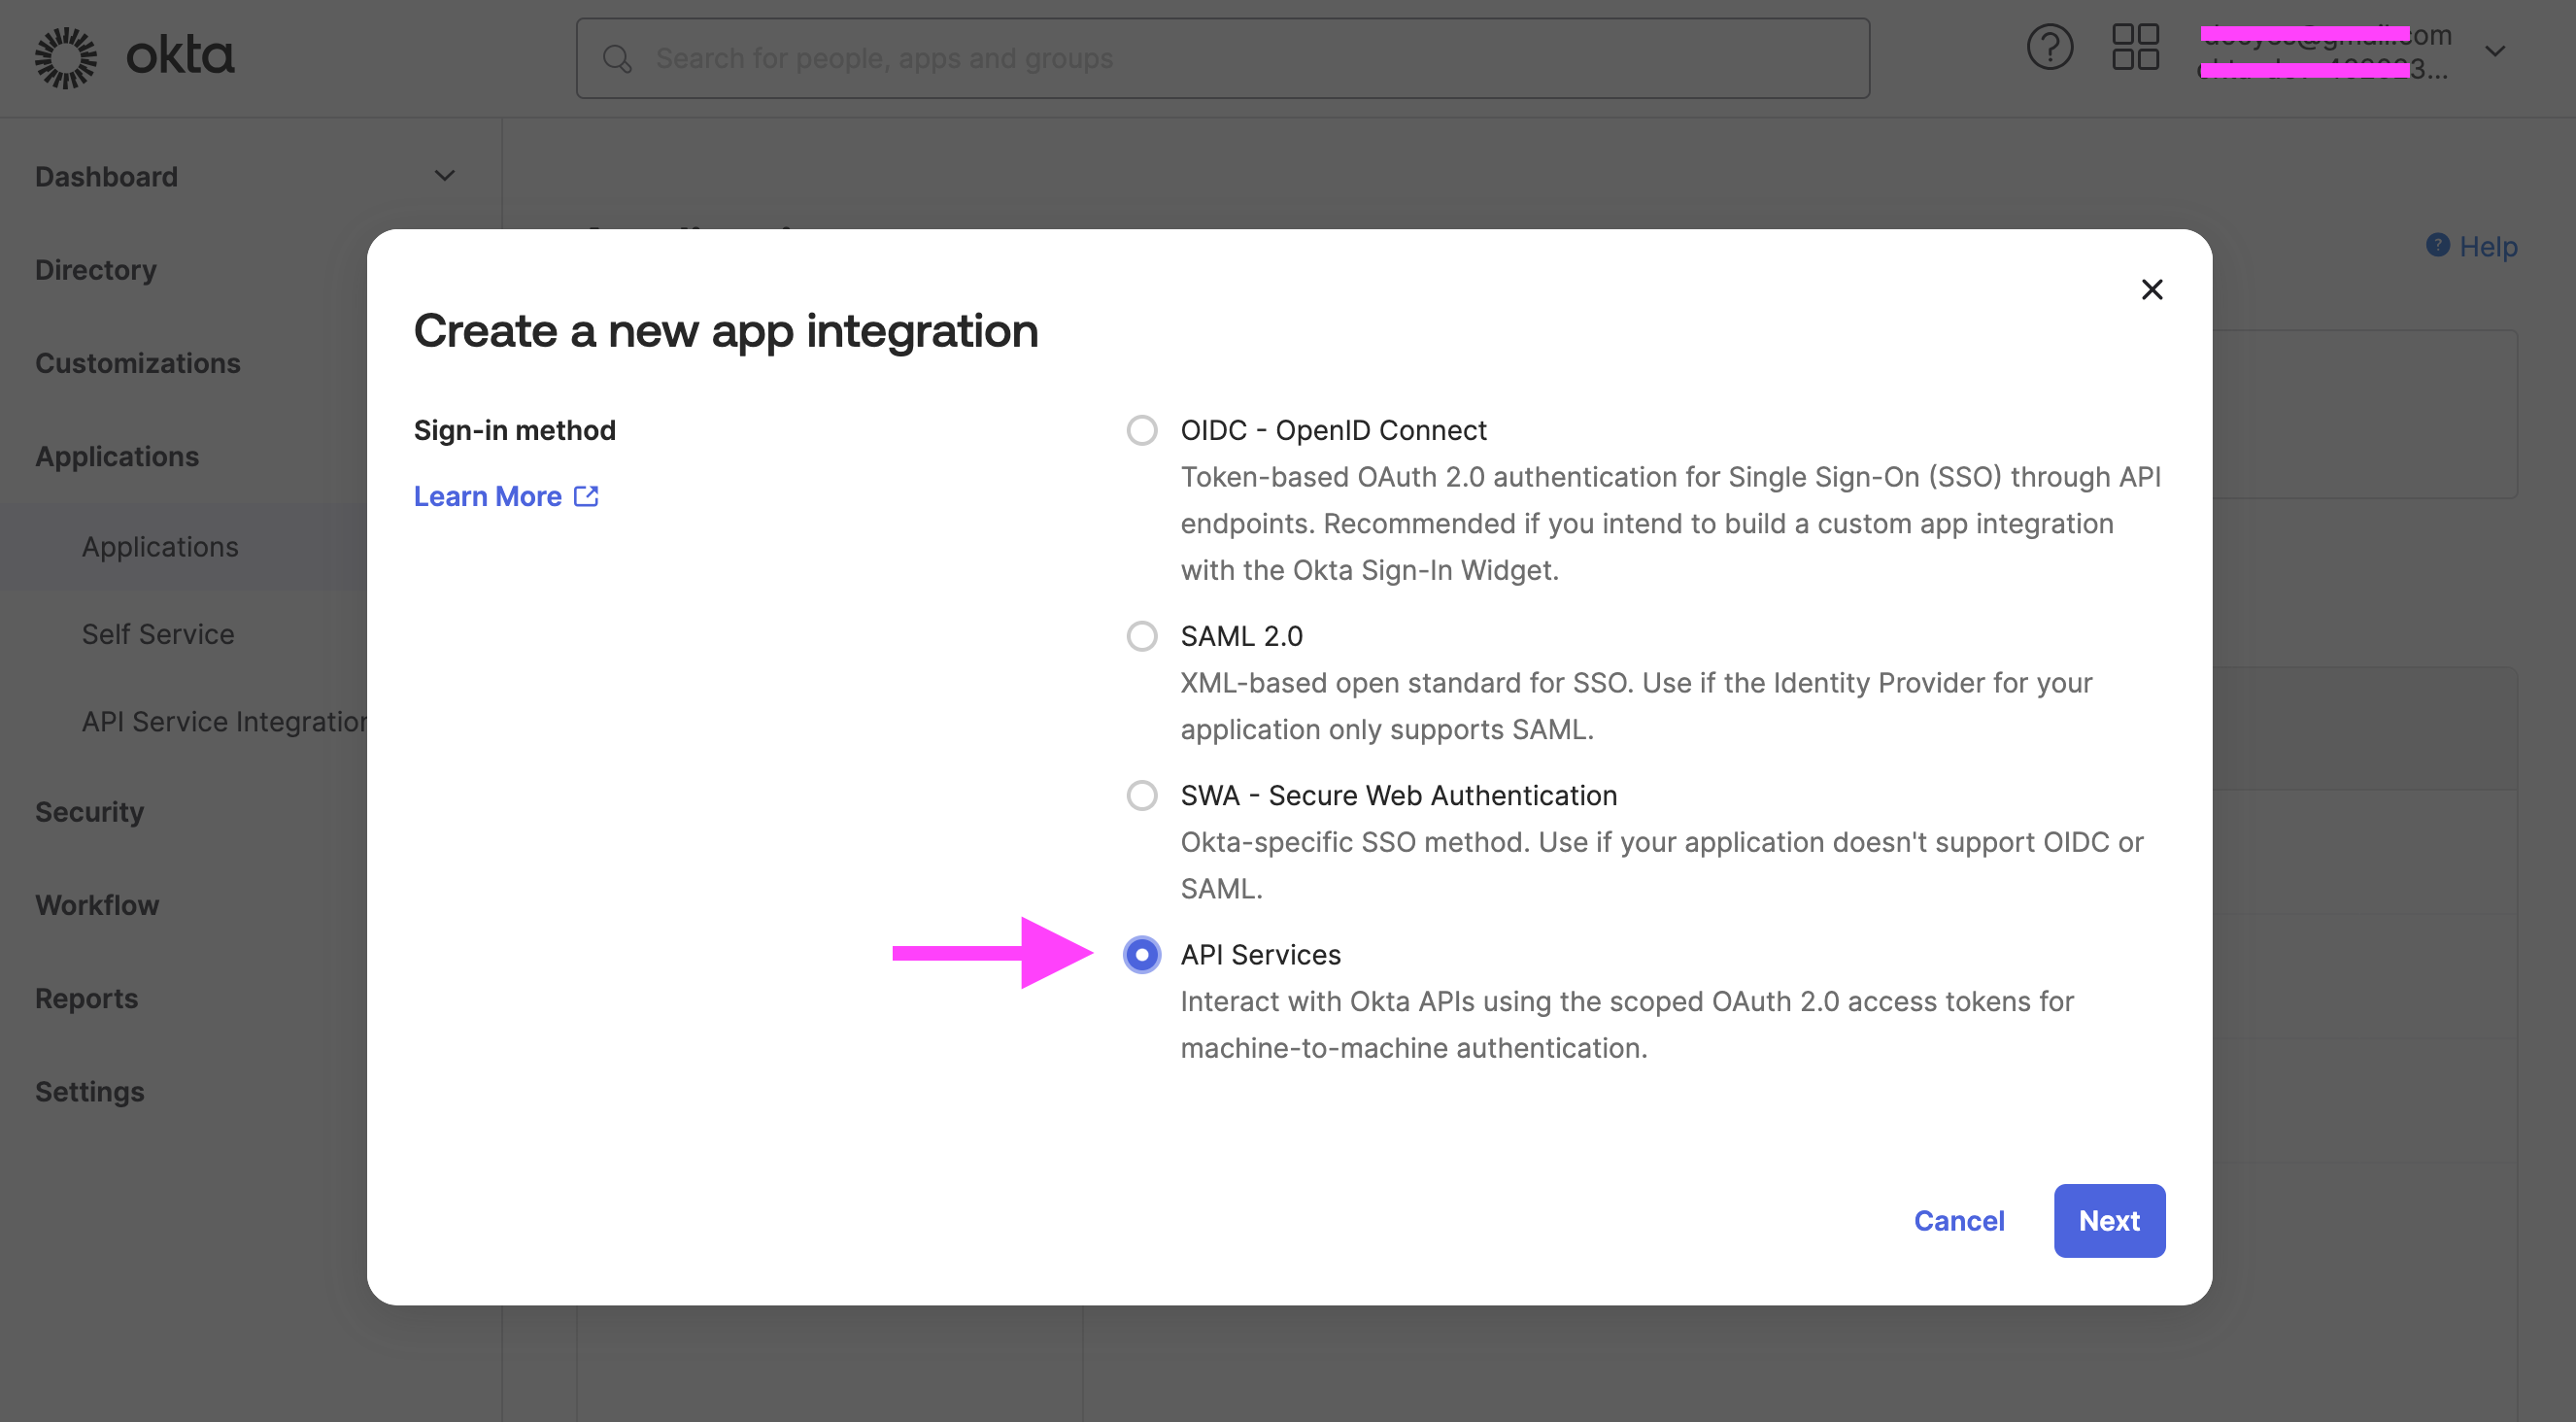
- Select API Services as the Sign-in method. Click Next.
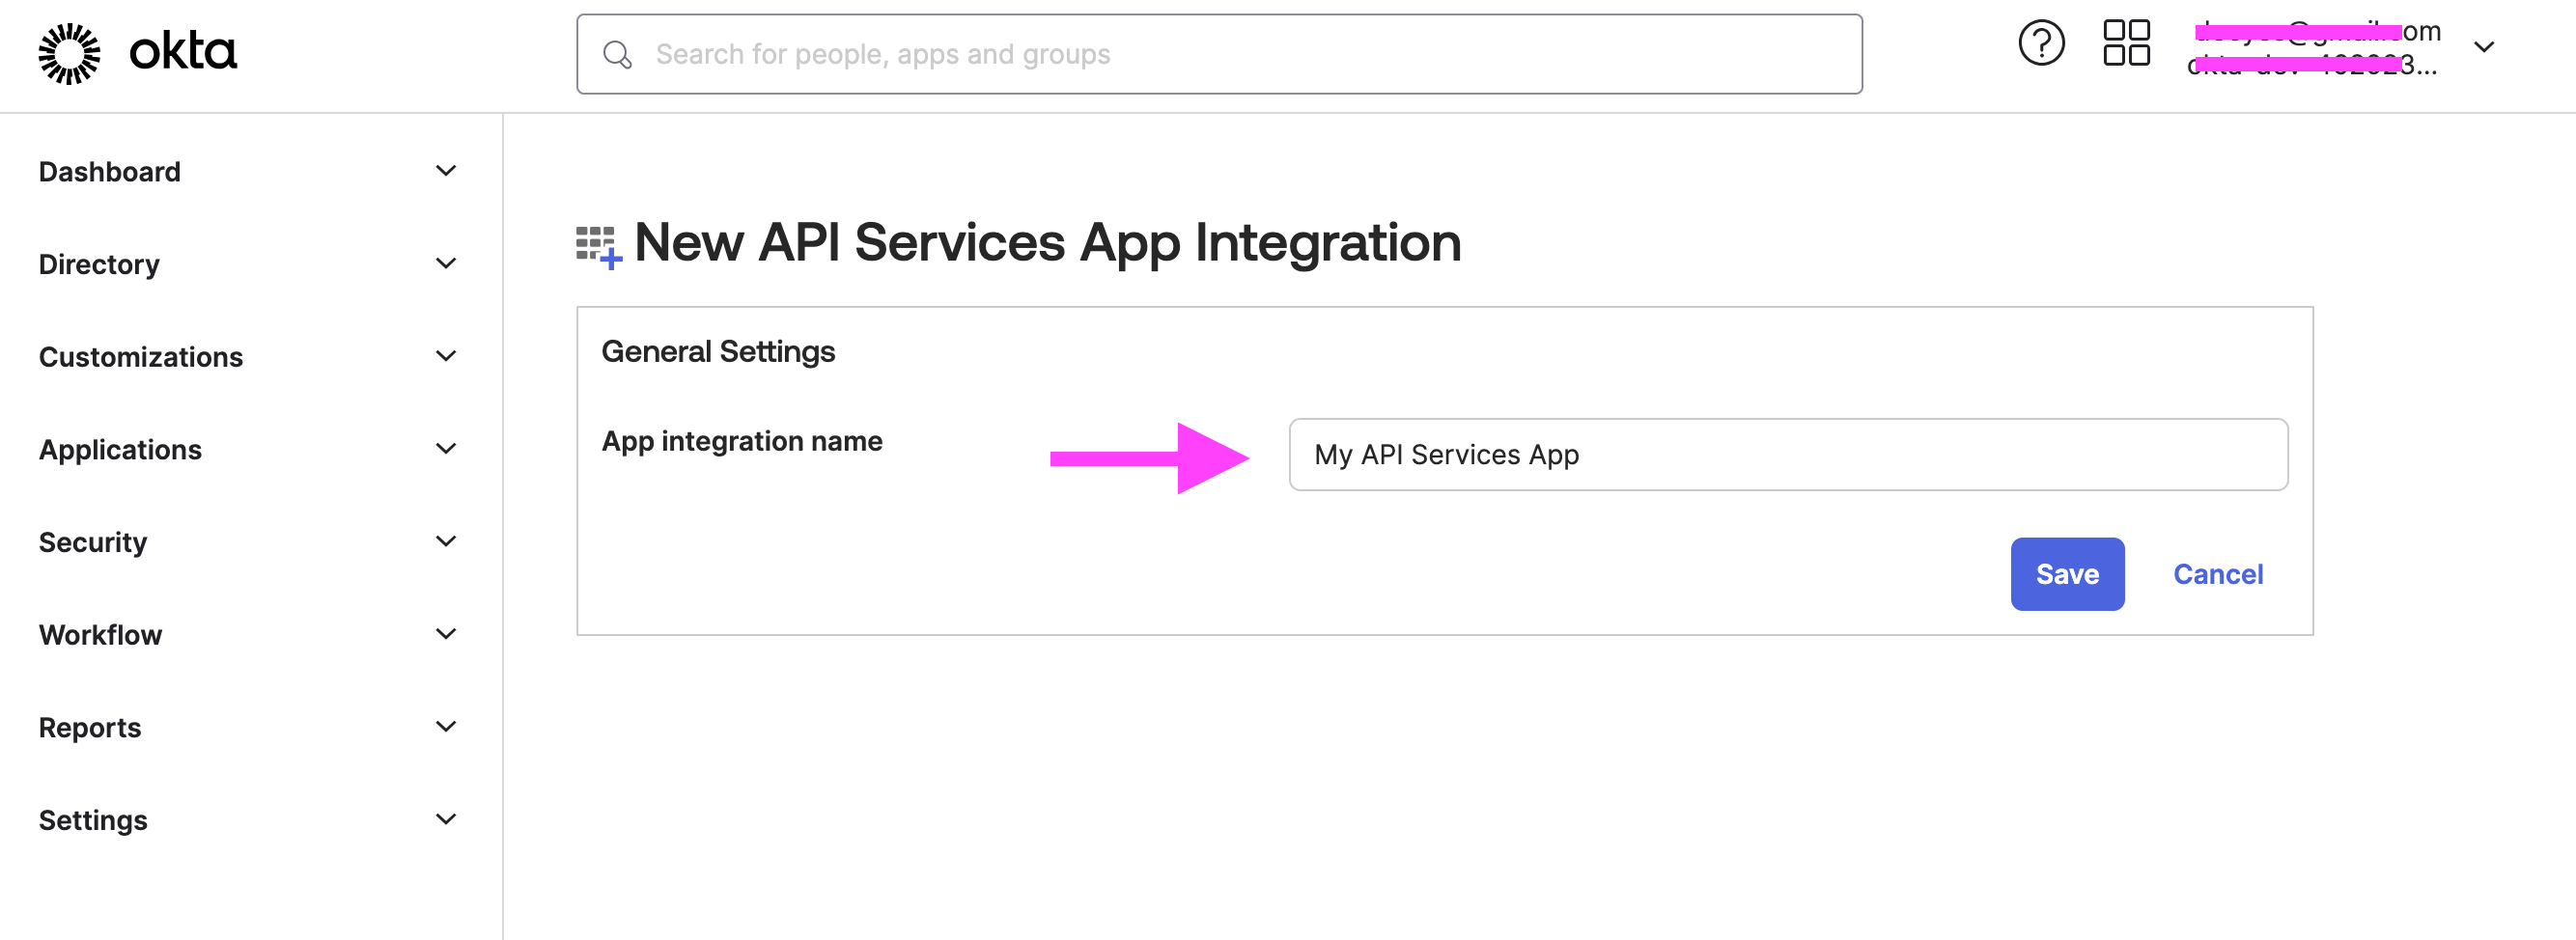
- Enter the app integration name, then click Save.
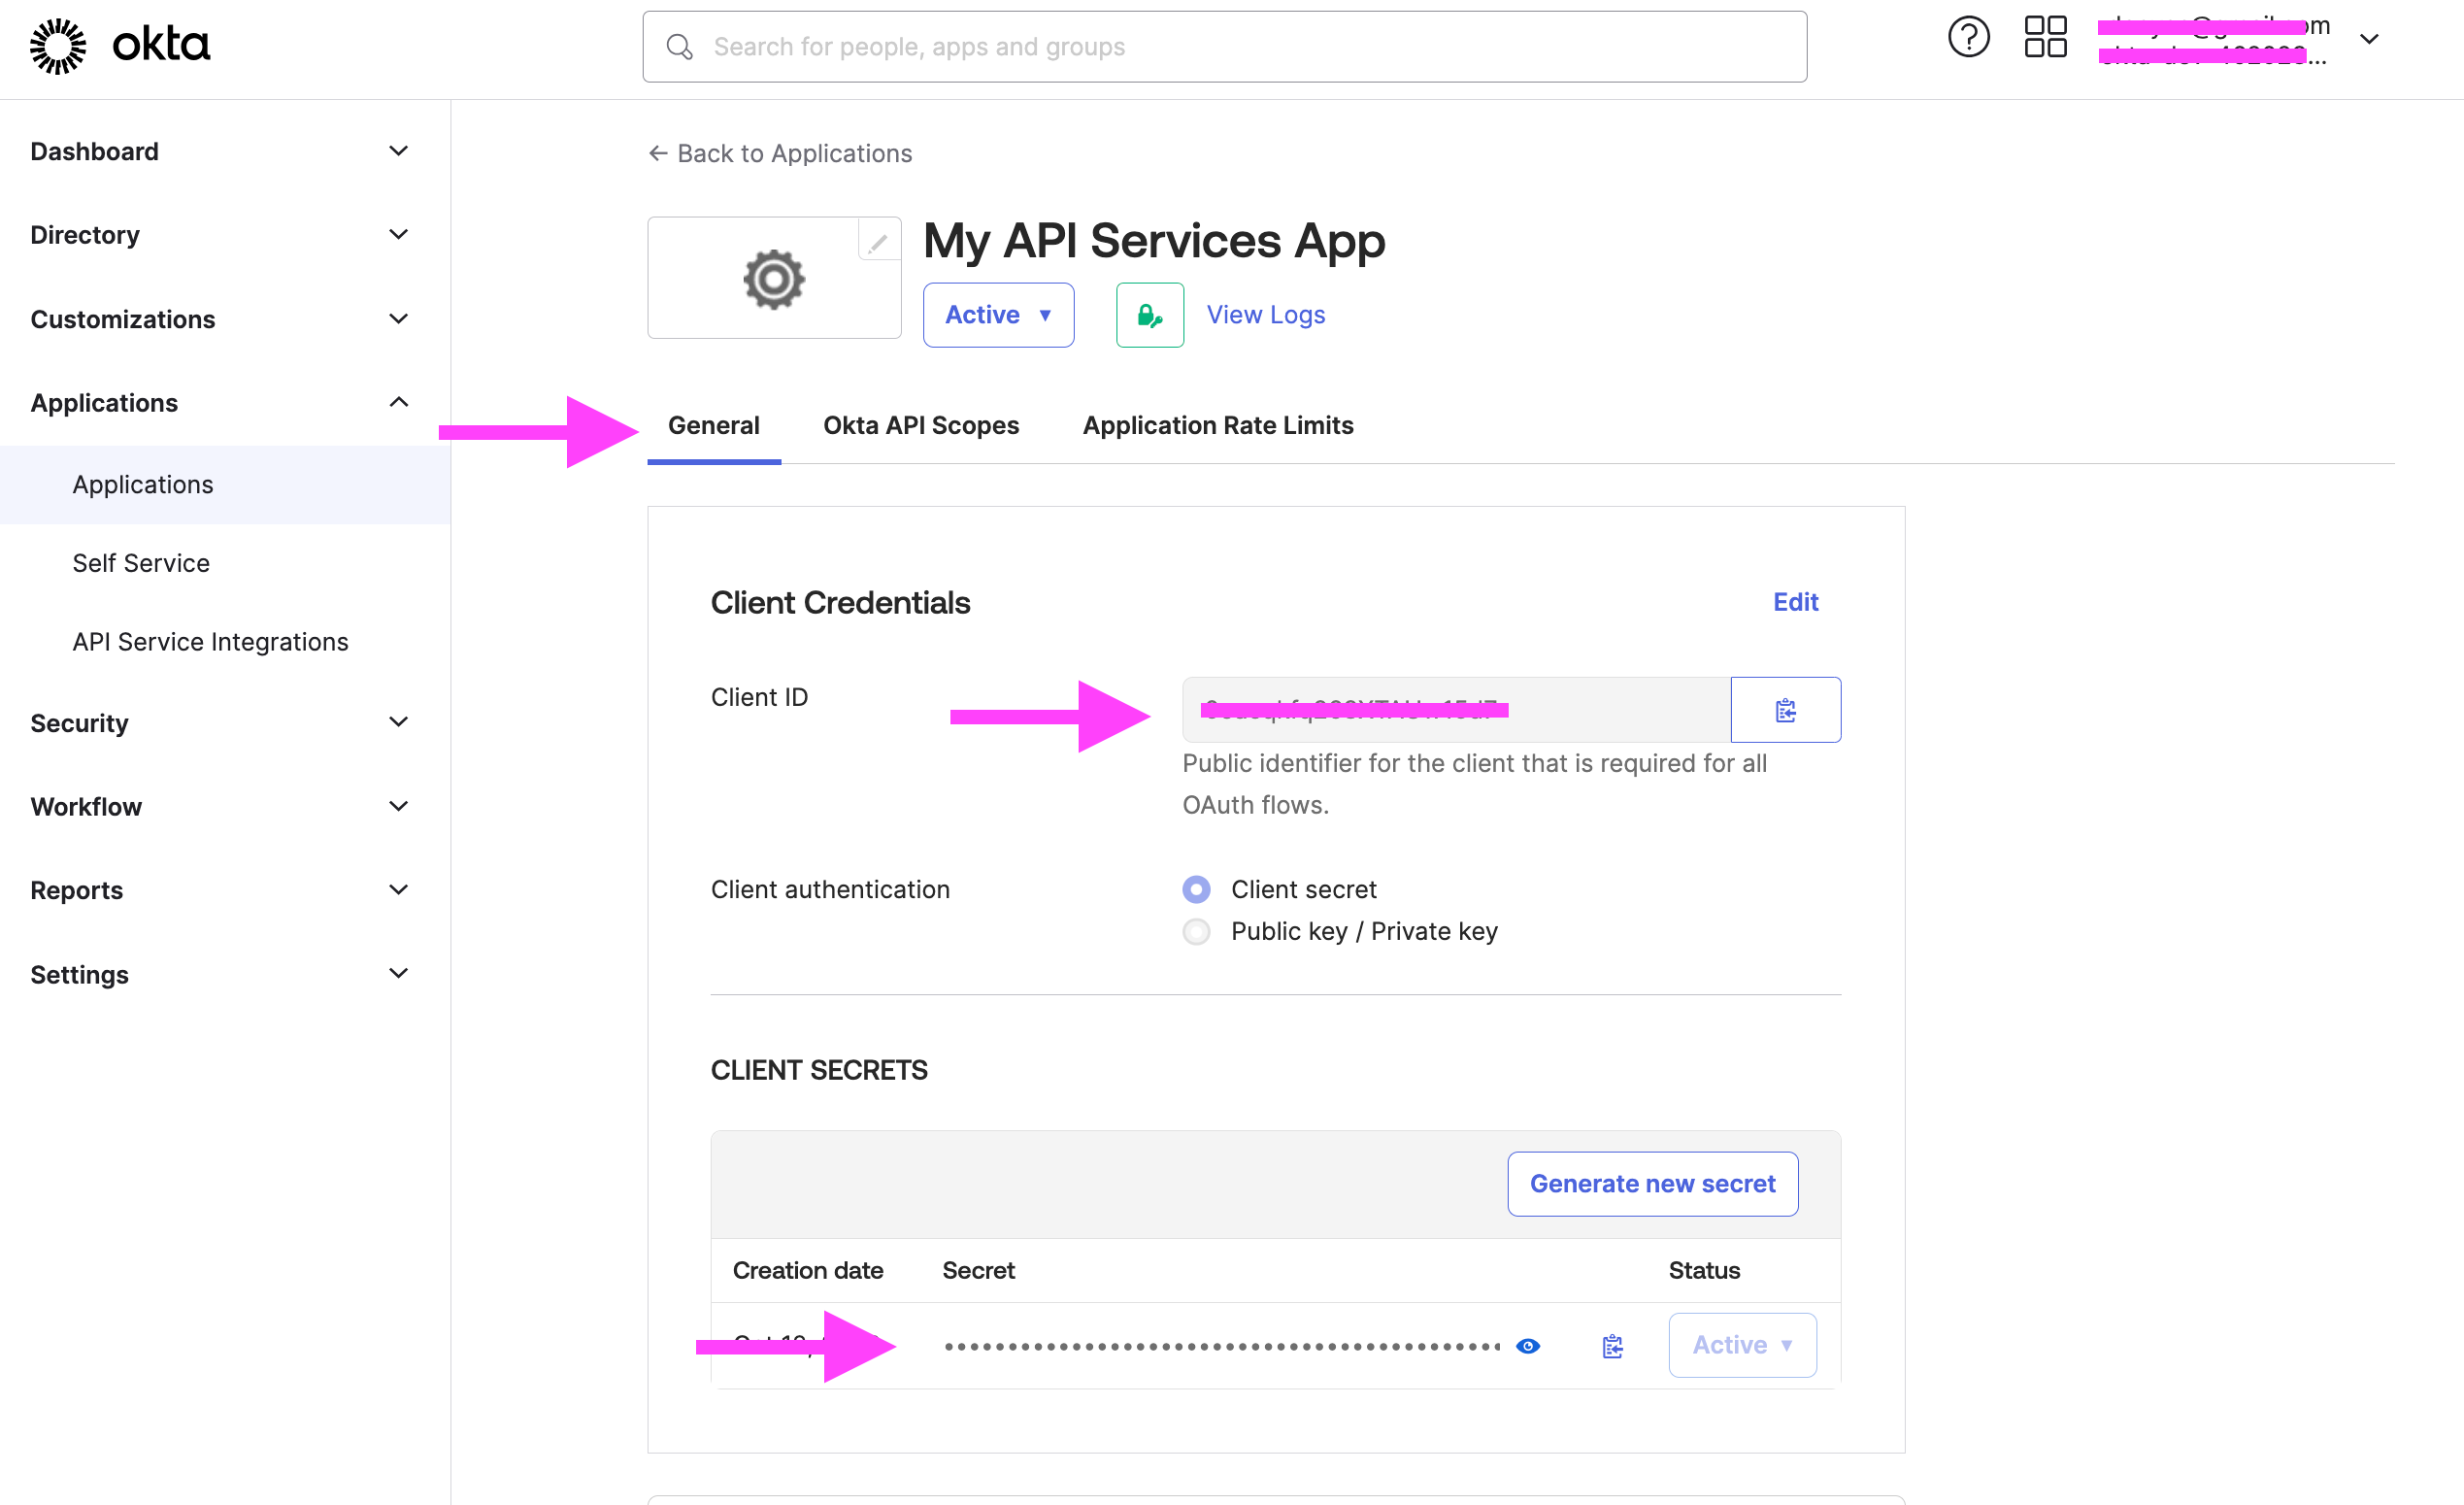
- On the General tab, the Client Credentials section copy the Client ID and Client secret values.
- Click on the top right menu that has your email, in the dropdown copy the Tenant ID just above the My settings link. It will have a unique value followed by the okta.com domain.
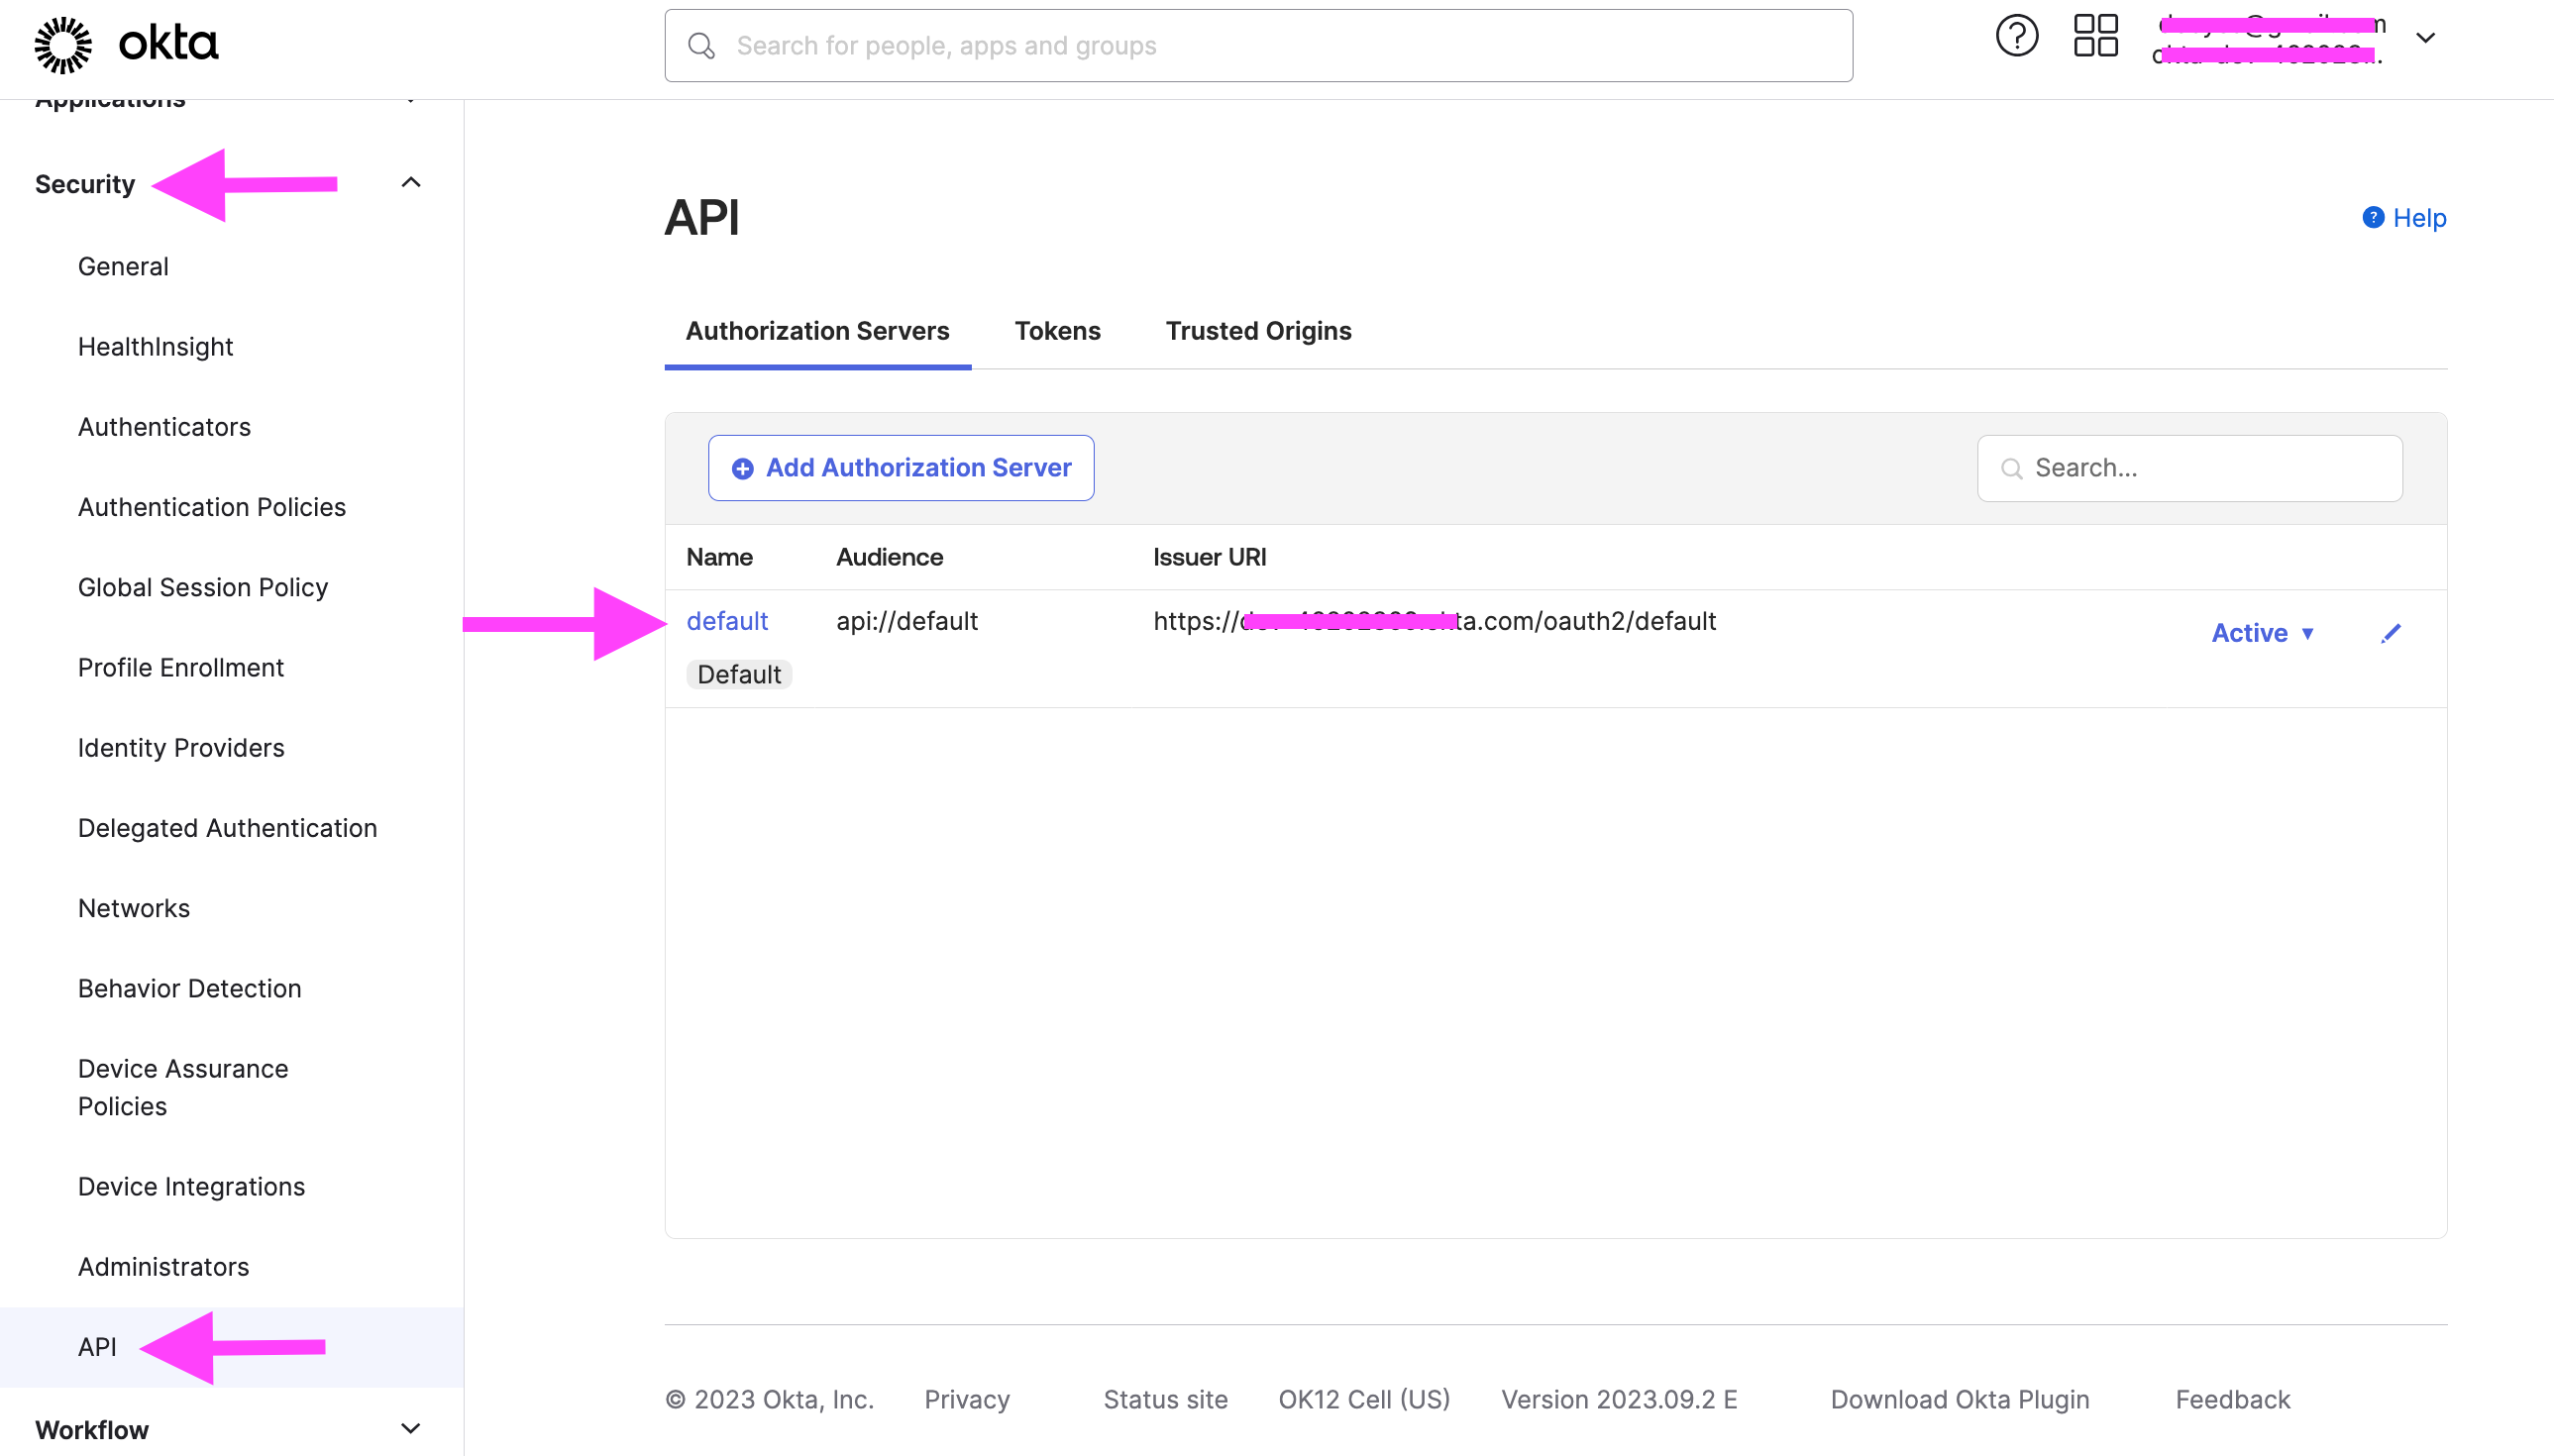
- Go to Security > API.* On the Authorization Servers tab, click the name of the authorization server (e.g., default).
- Click the Scopes tab and click Add Scope*.
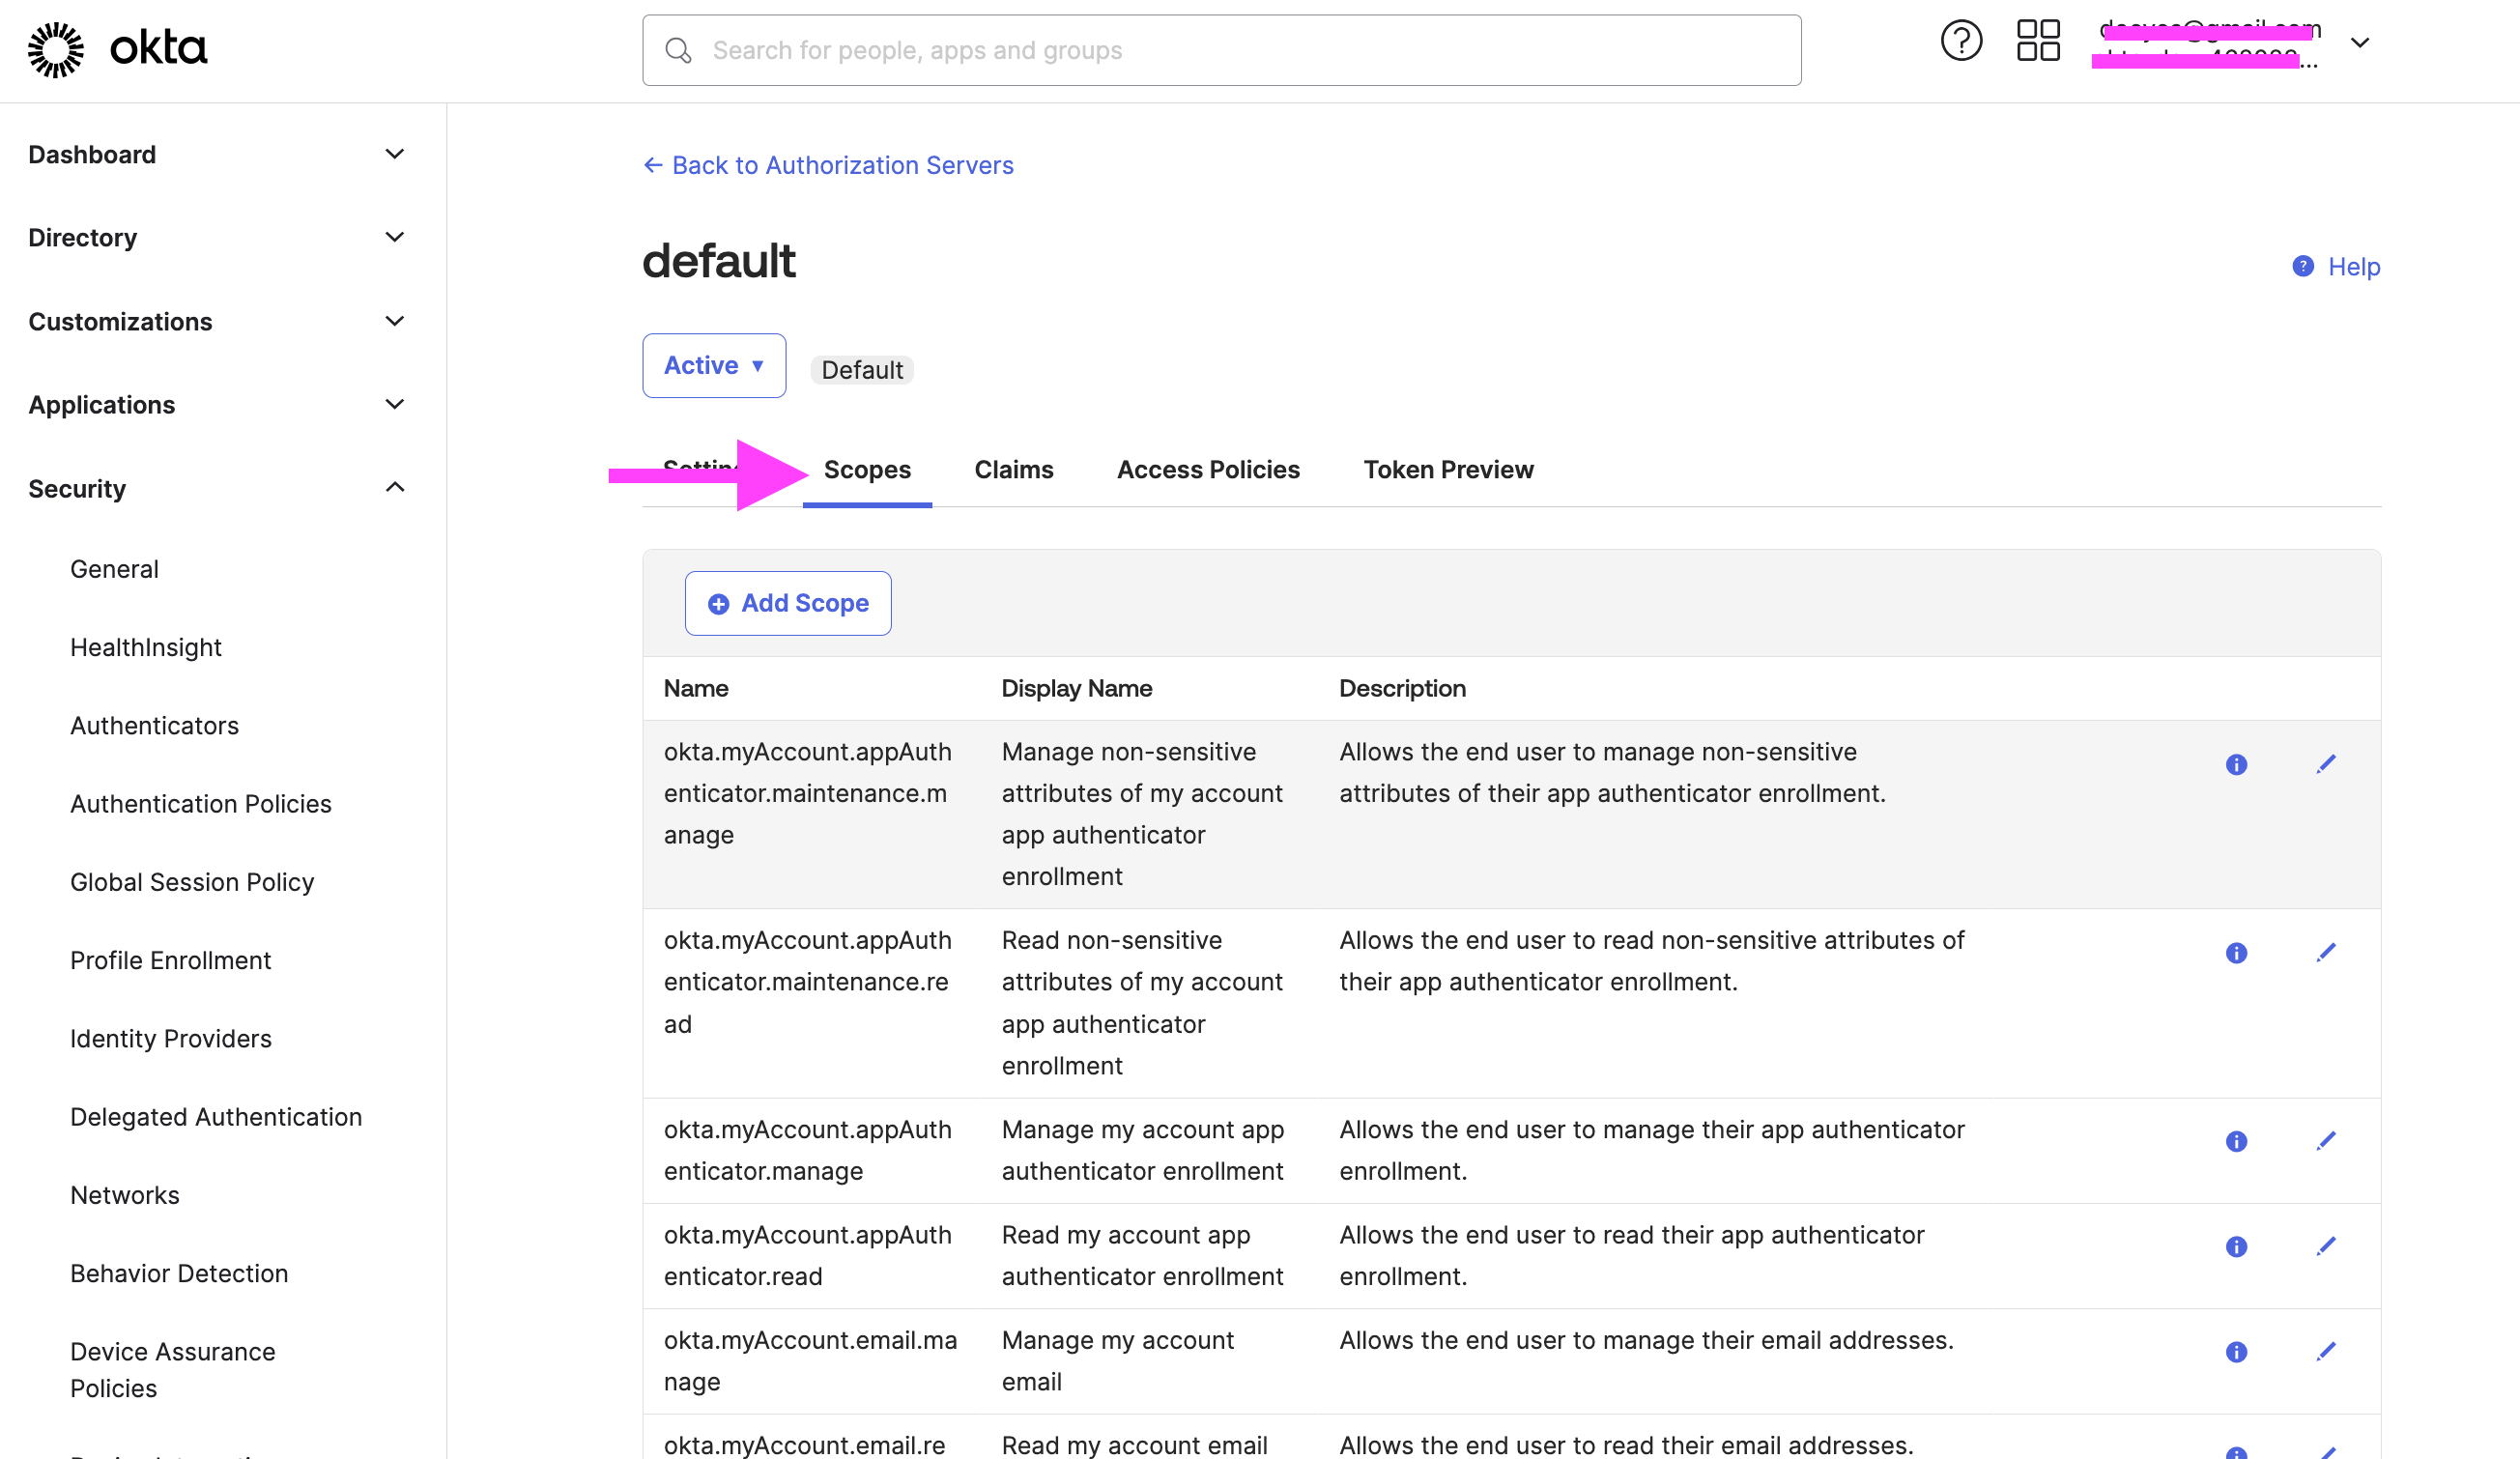 * The Client Credentials flow never has a user context so you will need to Create custom scopes.
 - Enter a Name, Display phrase, and Description.
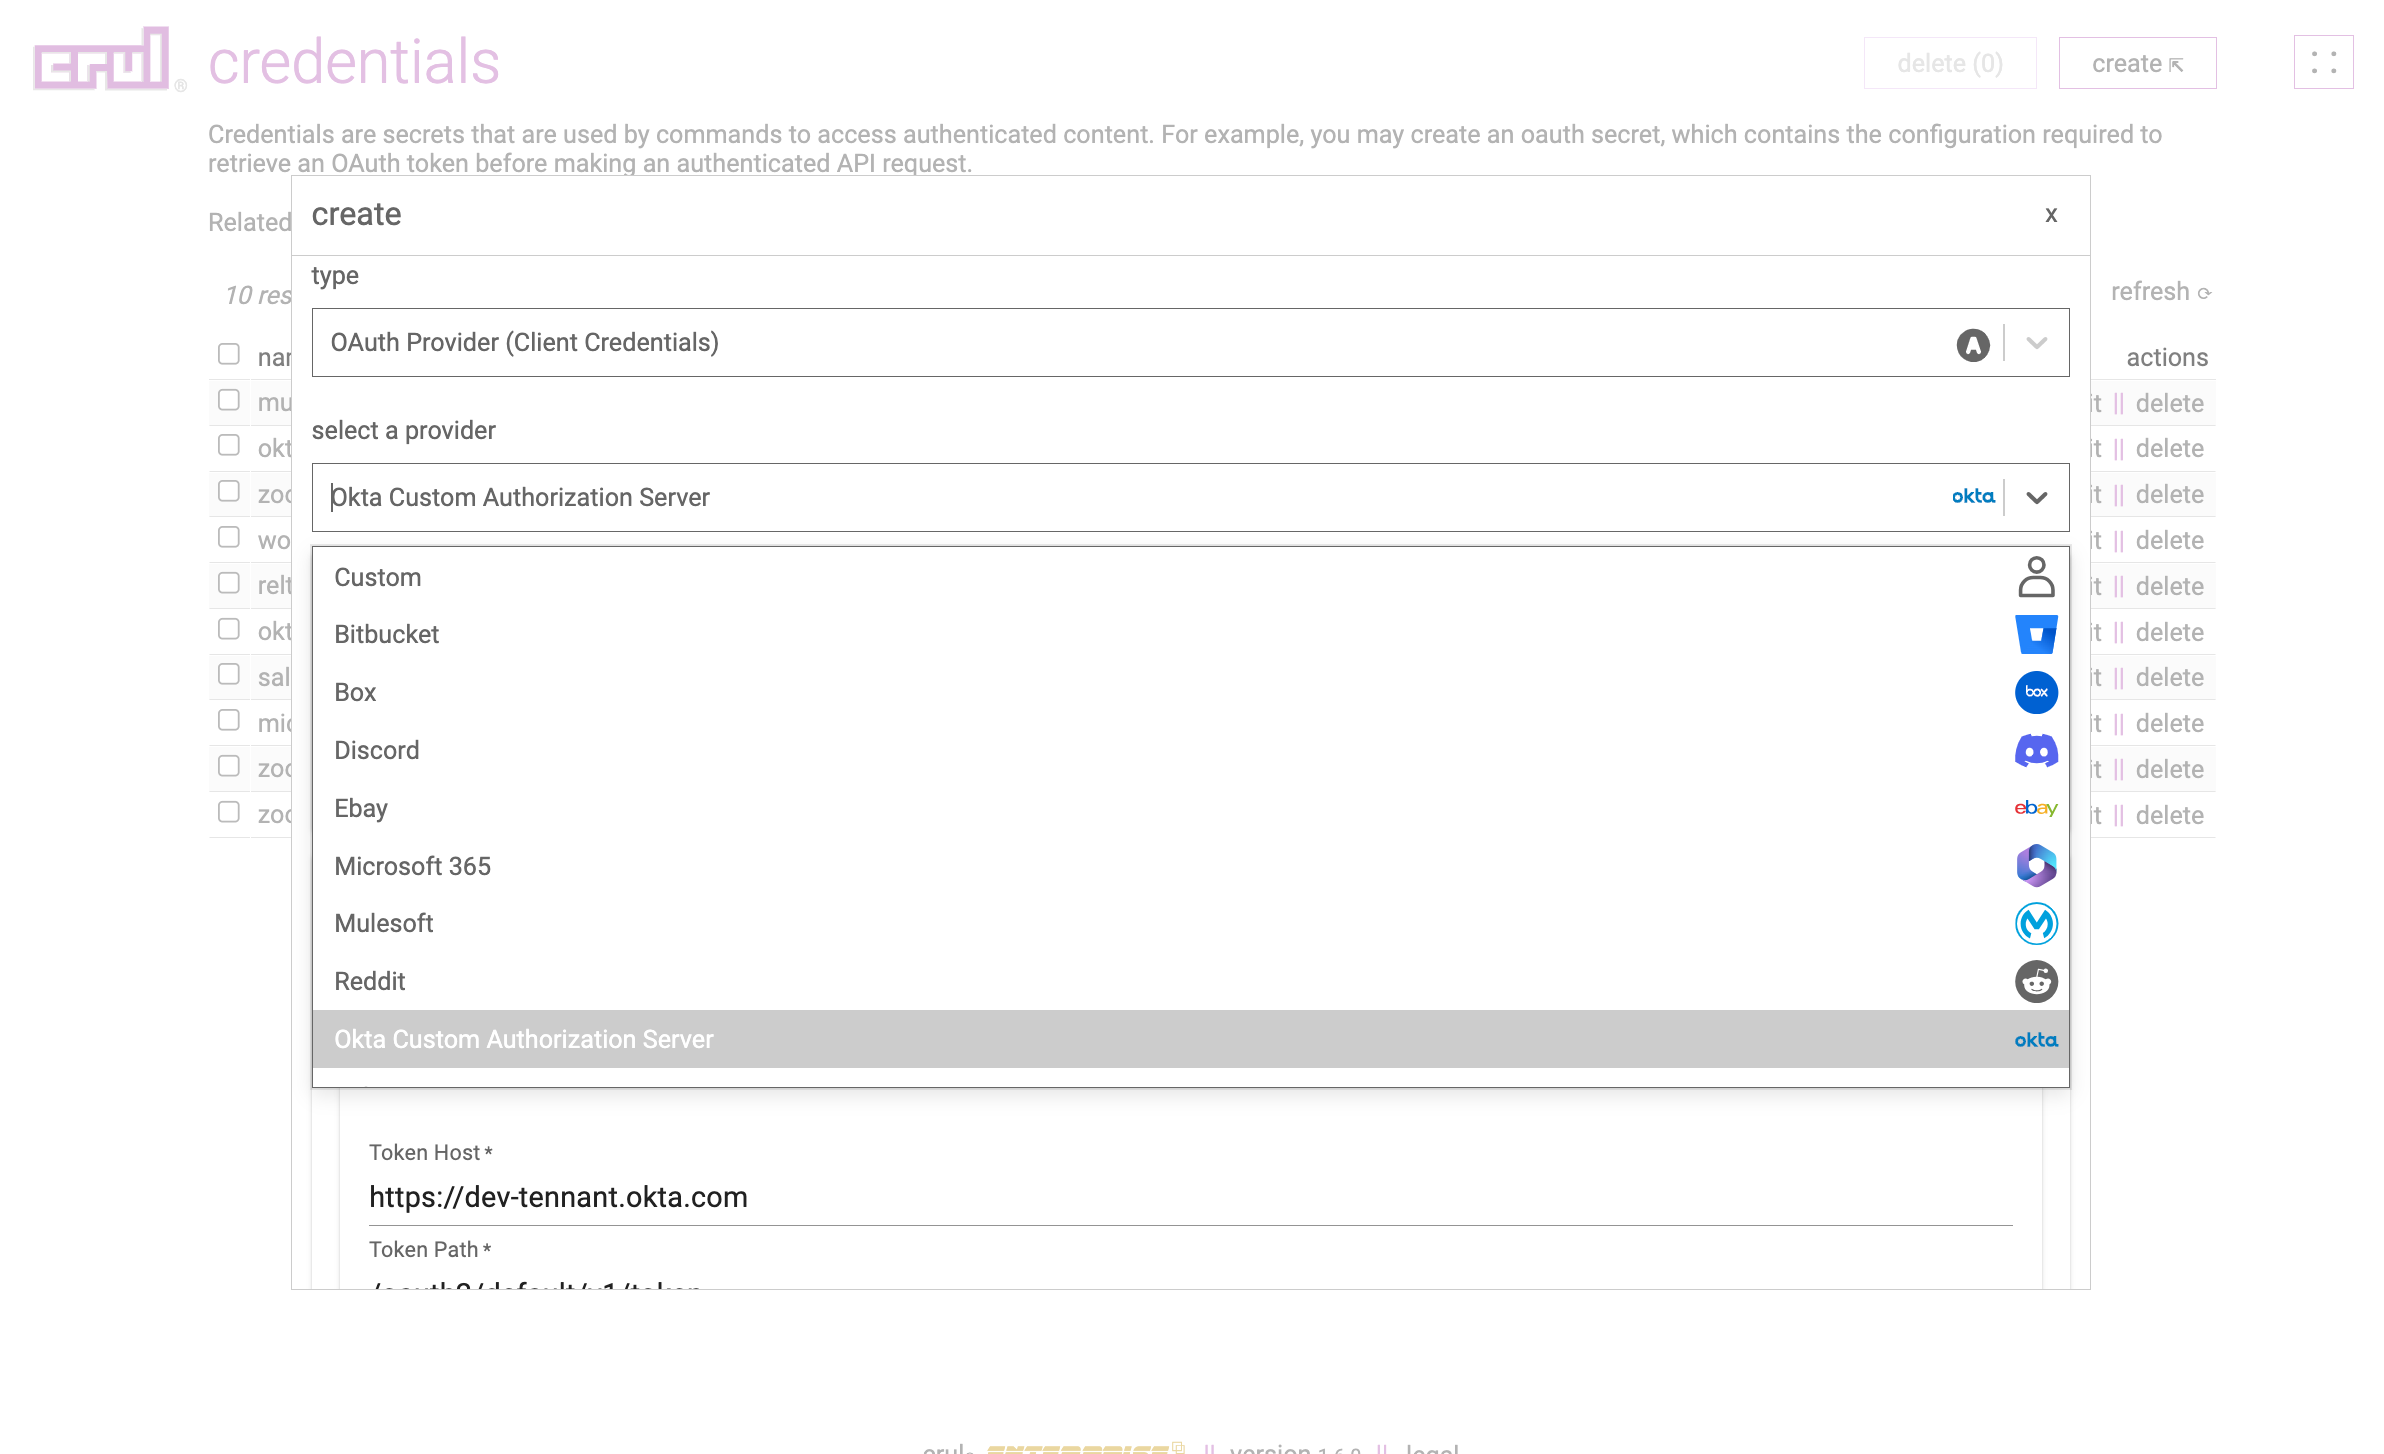
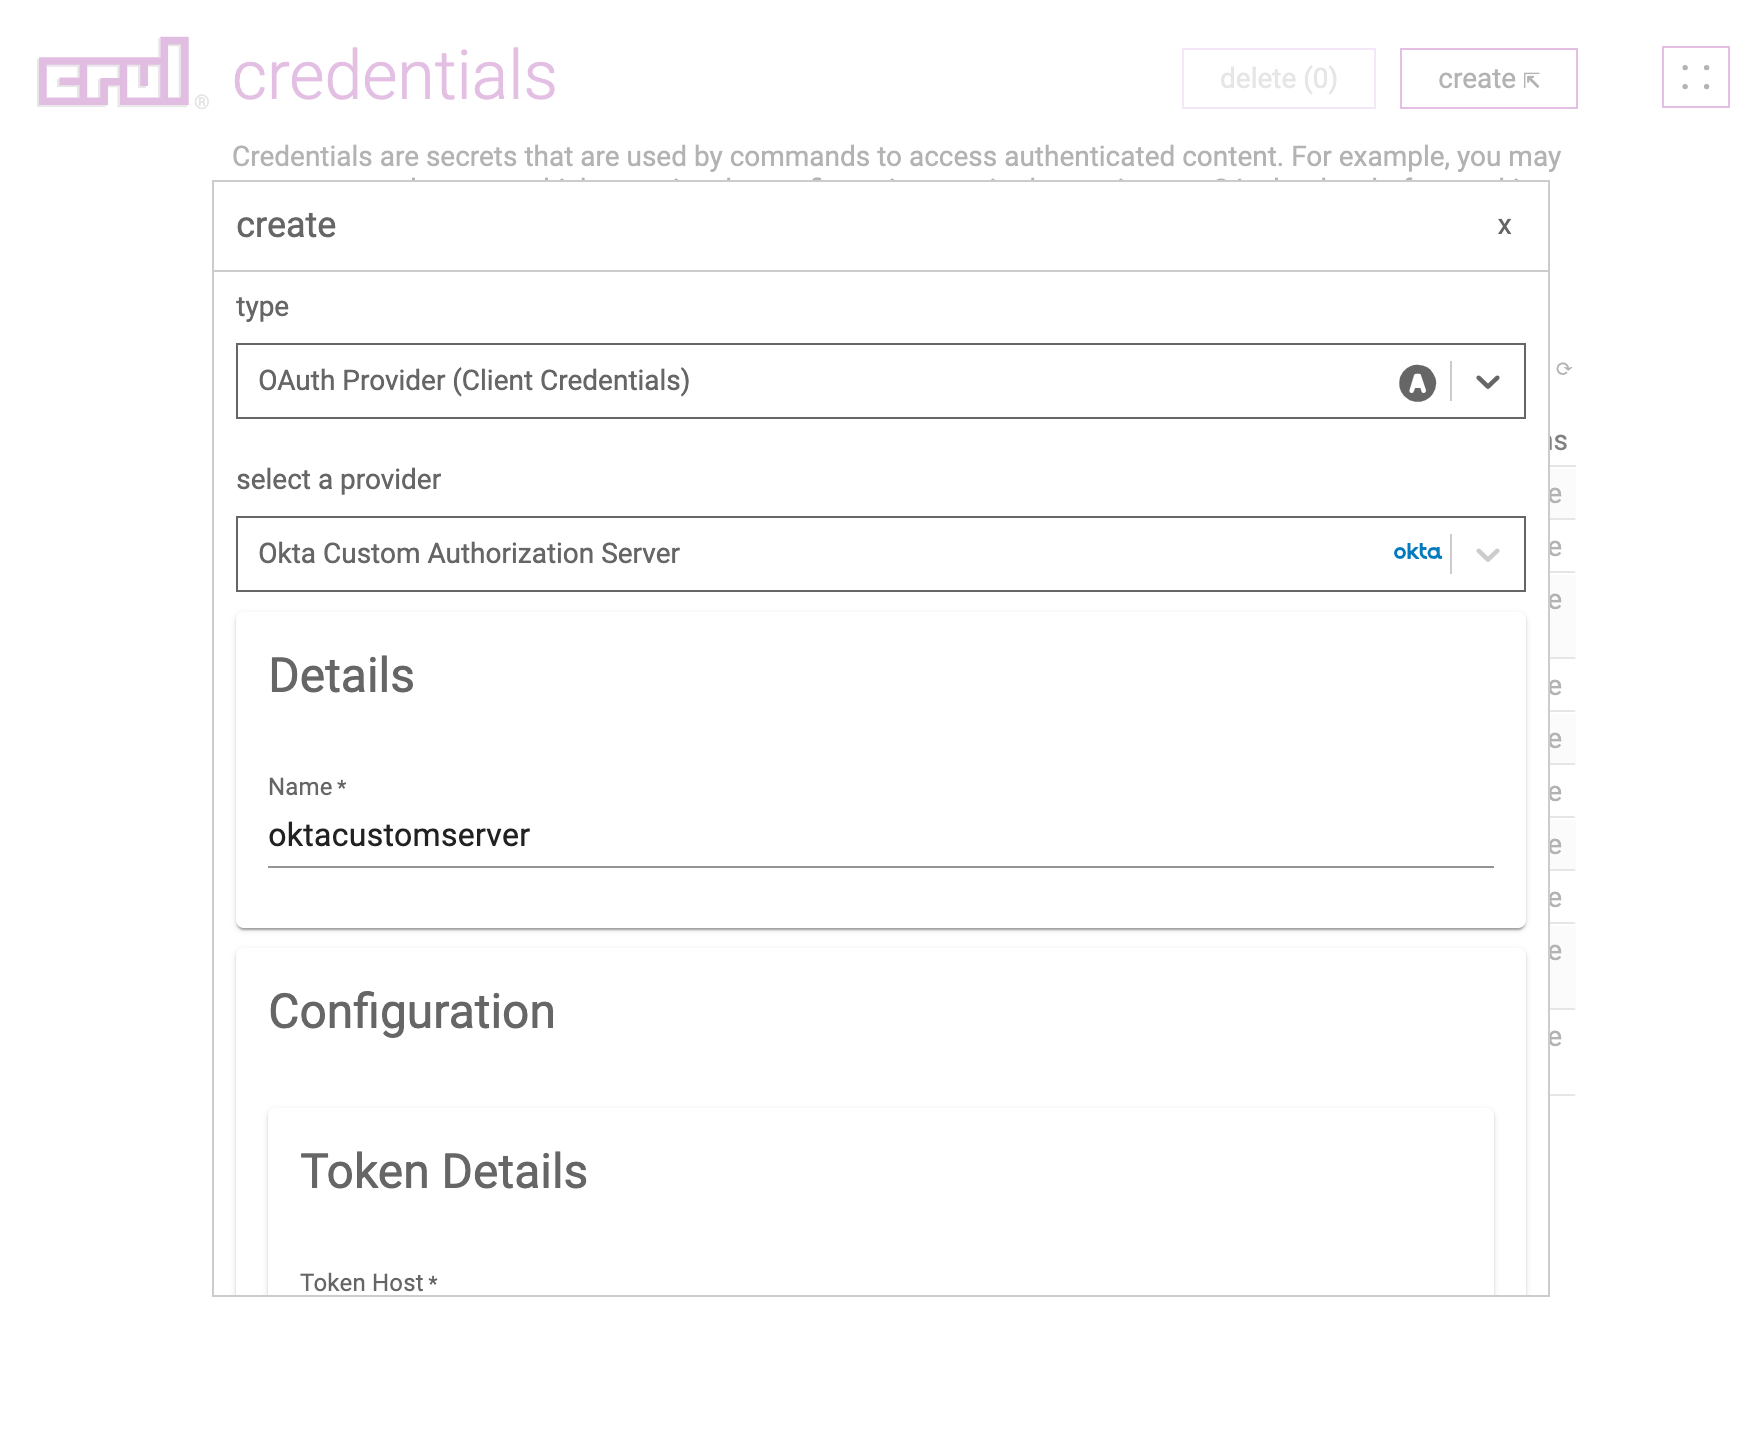
Configuring Okta Custom Authorization Server OAuth Credentials in crul
Navigate to the credentials page in crul (top right corner menu credentials).
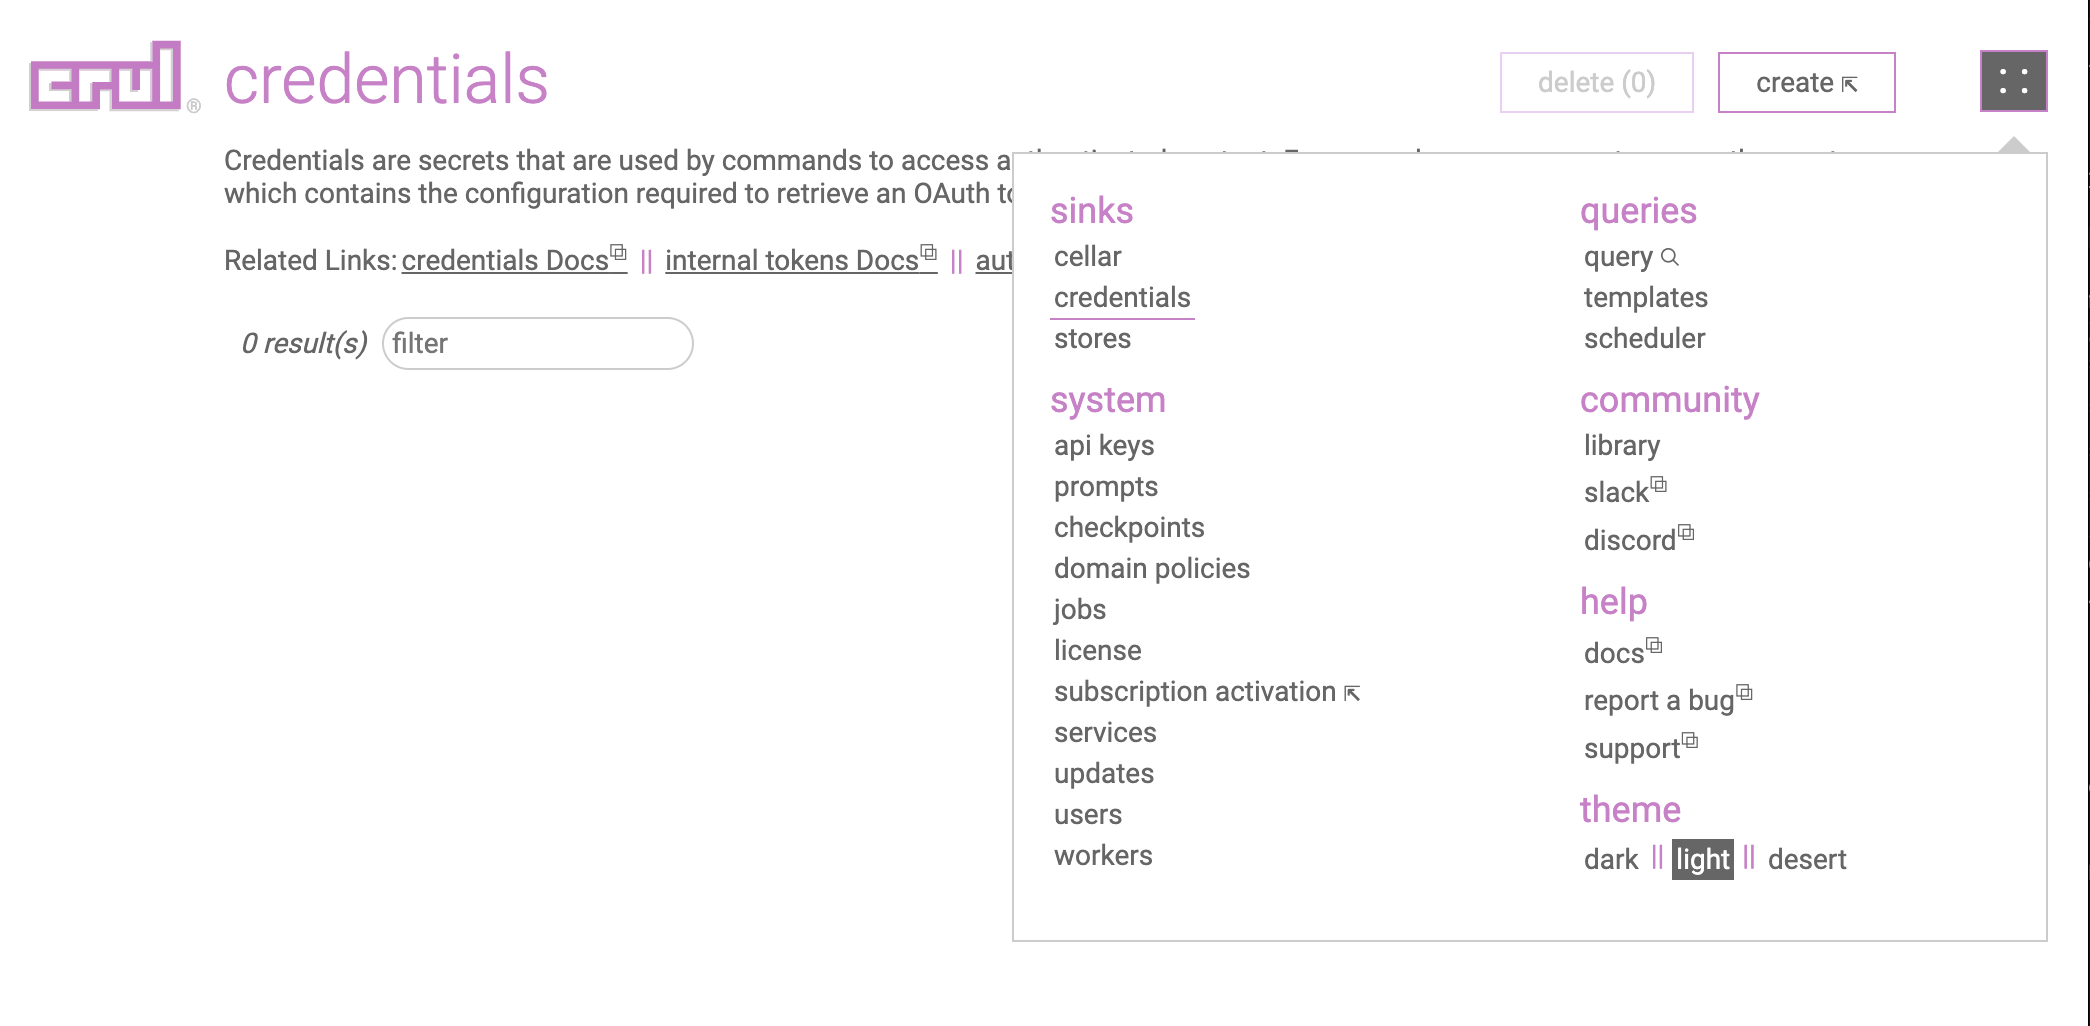
Click the create button.
Select OAuth Provider (Client Credentials) -> Okta Custom Authorization Server from the type and select provider dropdowns.
Enter the Okta Tenant ID previously copied value for the domain of the Token host into the credentials form entry.
Enter the Client Id, Client Secret and previously copied values into credentials form entry.
Click the create button.
Test the credential by running the following query. You should see a populated token.access_token column in the results.
oauth --credential "oktacustomserver"
